All Posts By

Kelly

62 In Contests & Giveaways/ Events

Giveaway: Martha Stewart’s Wedding Party

For those of you who haven’t gotten your fill of wedding shows yet this season, one show we are excited about is the upcoming Martha Stewart’s Wedding Party.  When the folks at Martha Stewart contacted me asking if I’d like to host a giveaway for tickets, I didn’t hesitate.  (I also have a special freebie for everyone at the bottom of this post).

Love her or hate her, Martha Stewart has helped to shape the way we view crafts, our home, our businesses and even weddings.  When planning my wedding back in 2004, before the height of the wedding blog boom, Martha Stewart Weddings was the closest thing I could find that focused on a more creative approach to weddings.  Several years ago while in NYC, I even had the chance to meet Martha Stewart… okay, actually she was walking into the David Letterman studios to tape an appearance and I was outside waiting for tickets to a later show and I started screaming “I Love You” like a giddy school girl.  I’m sure she heard me though!  Even now, when I have a tough business decision to make my husband often says… “What would Martha do?” (do they make a little bracelet for that? WWMD).

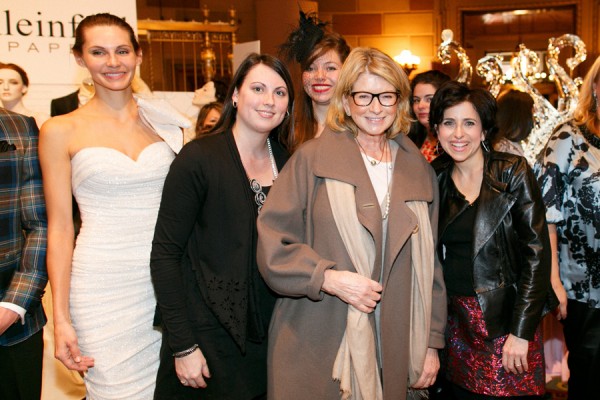
Photo by Allan Zepeda

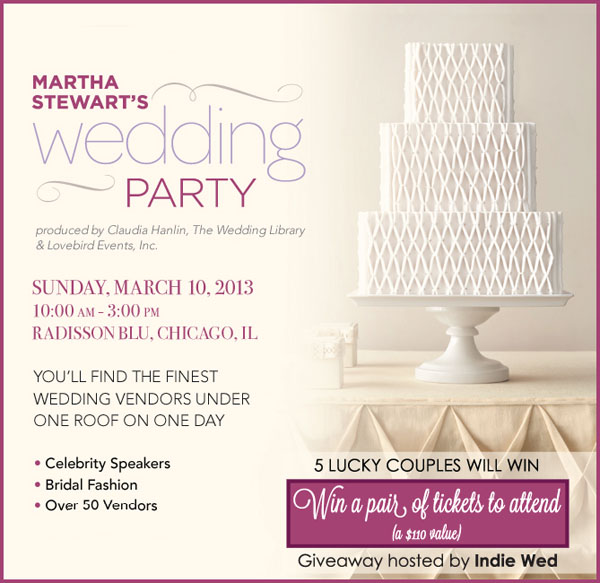
I’ve known about the annual MS Wedding Party event in NYC for a while because Indie Wed alum, The Blooming Quill is their go-to calligraphy vendor.  This year they are bringing the show to Chicago featuring 60 vendors with about 10 or so of them, being Indie Wed vendors.  However this event is very different than Indie Wed.  They have limited the vendors in each category to just a few making it more intimate. It is also a “luxury” bridal show so you can cross off the more budget friendly options.  Does this mean you shouldn’t go?  Heck no.  Just because you might have a more DIY or budget-conscious event doesn’t mean you can’t splurge in one or two areas.  Sometimes it is good to attend different events because you never know what you’ll find.  The show is on Sunday, March 10th from 10am – 3pm.  Basic tickets are $65 / single and $110 / couple which includes a swag bag.  There is also a VIP option too.  Don’t have $110 to shell out for an afternoon of wedding planning with your sweetie?  Don’t worry… I have some tickets to giveaway!

Martha Stewart's Wedding Party Giveaway

In addition to all the vendors there will be a roster of presenters with various breakout sessions including Martha’s right hand gal Darcey Miller and Indie Wed’s fave friend, Ami Price from Elizabeth Anne Designs.  There is a destination and honeymoon lounge too.  Plus I’ll be there taking tons of photos (and notes) – Say hi if you see me!

Panel of Event Experts
Darcy Miller, Editorial Director, Martha Stewart Weddings, and Celebrations Expert
Ami Price, Executive Editor & Publisher, Elizabeth Anne Designs
Meghan Andalman, Lovebird Events, Event Planning
Rishi Patel, HMR Design Group, Floral Design
Sarah Levy, Pastry Chef & Food Consultant, S. Levy Foods
Sacha Krasney, Be U Brides Stationery Design

Intimate Break-Out Sessions with your Favorite Vendors
Claudia Hanlin, Wedding Library “Throwing a Million Dollar Wedding”
Sarah Levy, S. Levy Foods “The Dish on Wedding Food”
Ami Price, Elizabeth Anne Designs “Inspiration to Implementation”
Richi Patel, HMR Design Group “Wedding Floral Design”
Elena Grapsas, Ultimate Bride “Trends in Bridal Fashion”

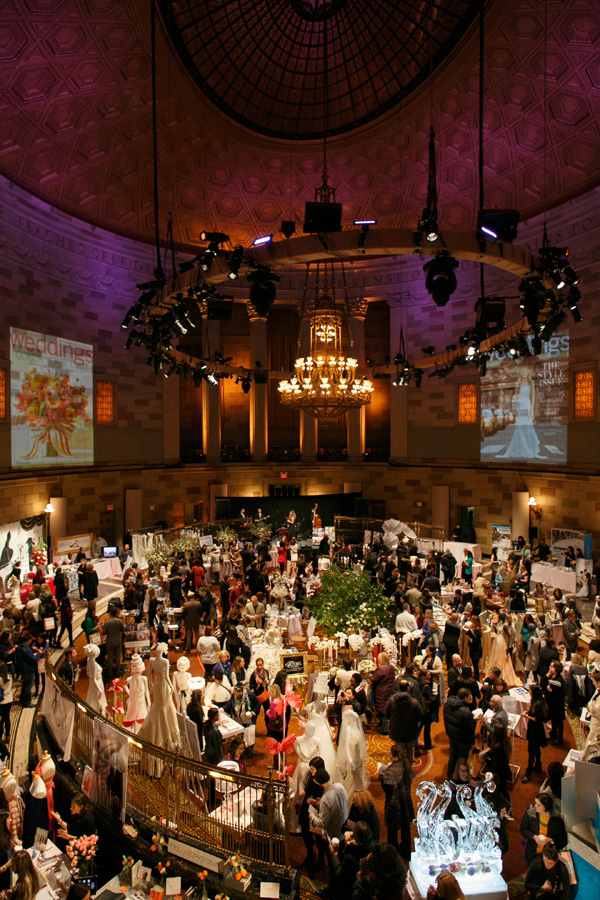
Photo by Allan Zepeda

The best part… I have enough tickets for FIVE lucky couples.  That is $550 in free tickets. How awesome.  To be considered, just post a comment below by Wednesday at noon.  A that point, I’ll select 5 people at random who will each win a pair of tickets to Sunday’s show.  Please include your email address so I can reach you.

If you aren’t one of the lucky ones to win free tickets, I do have a special little freebie for everyone.  Starting tonight you can download a FREE digital version for the iPad of the spring edition of Martha Stewart Weddings (which doesn’t even hit the stands till March 4th).  This offer will be active for 1 month.  Just follow this link and use the code GCmCDN.  Just look at that cake!
0 In Decor/ DIY Projects

DIY Table Numbers + Silhouette Promo

UPDATE:  The promotion listed below has been extended until March 10th.

In an ongoing effort to beef up this blog, I’m going to start posting the occasional DIY project.  Anything I can think of that will be fitting for your wedding (and beyond). So let’s get crafty!

Perhaps it is because of the fun things Nicole has made over at Making It Lovely, but I have wanted one of those Silhouette die cutting machines for a while.  For my recent birthday I decided to treat myself and buy one.  I have a few ideas of things I want to make with it but thought it might be fun to start showing some DIY projects you could do for your wedding.  First up, some fun table numbers I created.


DIY Silhouette Table Numbers via Indie Wed blog

If this couple looks familiar, it is because I originally designed them for the most recent Indie Wed winter show and they were in all the promo material.  Beyond that, if they look familiar it is because they were based off of a variety of photographs, mostly from Audrey Hepburn and Paul Newman (who should have been in a movie together!)  My original idea was to create this tent fold table number as shown above.  I created two different ones and while assembling them I decided to try something different with the second one.  See below.  Which do you like best?

DIY Silhouette Table Numbers via Indie Wed blog

This was really the first thing I made with my Silhouette so I’m still learning how to use it.  (Any tips or tricks are appreciated btw).  For those of you that are considering getting one, a few things to note…. There are two different styles of the Silhouette machine… the Cameo (MSRP $299) and the Portrait (MRSP $199).  The Cameo is larger cutting up to 12×12″.  The portrait is smaller, lighter and less expensive and perfect for smaller projects.  It cuts up to 8.5″ wide I believe.  I decided to go big and buy the Cameo.  Compared to a large AccuCut die cutter I have, this thing is pretty small, like a small printer.  It comes with the Silhouette software which you have to use to actually cut anything.  While the software has a lot of basic functions (and perhaps if I use it more, will seem even more comprehensive), I prefer to do all my designing in Adobe Illustrator.  It is just what I feel comfortable with.  What I didn’t realize is that the two weren’t really compatible.  You can’t design something in Illustrator and cut it out unless you upgrade to their other software, the Designer Edition for $50.  Well I knew I would be doing most of my work in Illustrator so I got the upgrade and am super glad I did.

DIY Silhouette Table Numbers via Indie Wed blog

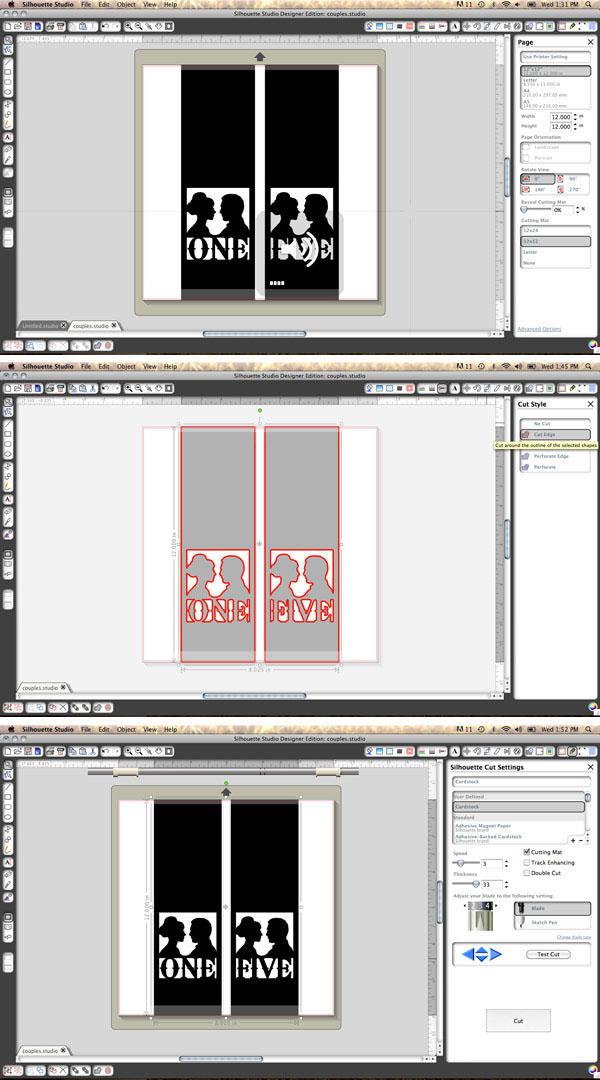
All you do is save your Illustrator image as an .svg file and open it in the Silhouette Software.  Next you select everything and ungroup (which is great if you have something with different colors on it).  You then click on this other button for the cutting style and it basically just traces the edges so they become cut-ready.  Lastly you just select your cutting options which has to do with what type of material you are cutting (this thing cuts everything from paper to vinyl to fabric!).  I actually found this tutorial online which helped a lot.

DIY Silhouette Table Numbers via Indie Wed blog
Here is a quick breakdown of the steps to make the table cards.  While I was doing the final steps, I didn’t have anyone to photograph me assembling them so I’ll try to explain it. It is really easy!

1.  Create your image and open it using the Silhouette software (Designer Edition if you want to import from Illustrator).
2.  Load your paper into the machine & set your cutting preferences.  You adhere the paper to a thin, slightly tacky, plastic cutting board
3.  Watch it cut.  This step is really interesting.  When I did my first test I thought my machine was broken…. it made this weird sound as it was cutting, almost like signing. I quickly googled it and realized that this was normal.  You get used to it pretty fast and it is actually a bit relaxing.  It makes its own music!
4.  When you are done you peel away the paper from the plastic cutting board.  I really liked the way the scraps from the negative space looked as it was left behind.
5.  I trimmed any little bits on the ends and then scored the paper using this handy scoring tool I picked up a while ago.  These particular cards are 12″ long and 3.75″ wide.  I scored them in half (6″ mark) and then 1.5″ up from each end.
6.  After scoring, I gently folded them along the creases.
7.  Since I wanted the silhouettes to stand out against the inside of the tent fold, I cut some paper in a contrasting color. This was some pretty paper with a soft pink and white pattern.
8.  Glue the cut paper (3.75″ x 4.5″) to the inside back of the card.

To finish the tent fold style… I just took the two bottom flaps and glued them together, overlapping about a 1/2 inch.  I realized when looking at it standing up that the the number disappeared into the bottom of the tent fold so I cut another piece of the pink paper and attached it to the inside bottom of the card.  You can see that in the 3/4 view in the top photo.

To finish the flat style card…. After step 8, I just glued the back of the cut silhouette side and stuck it all together.  I left the flaps unglued and flared them out for support.  The to just give it a little more stability, I cut a scrap of paper the total size of the flaps and glued it to the bottom.  However, if you were using a pick or a stand for your table numbers, you could just cut the flaps off and use the stand.

These were super fun and you could do so many different things with this concept… use your own silhouettes, cut skylines from your favorite cities, or any other variety of shapes that could play off of your interests.  You could also just do straight text and even make signage for other parts of the reception.

So now for the fun part for you!  After I bought my machine, I contacted the Silhouette people with some questions I had about the software etc.  When I was explaining to them how I wanted to use the machine they offered to create a discount code for anyone I know who might also want to try their hand at using a Silhouette machine.  If I can pass on some savings so other crafty folks can make cool things for their wedding (or business, or house, or kids or… well you get the idea) then sure, why not.

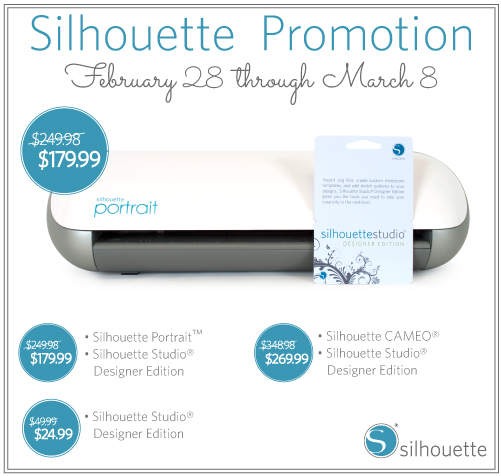
Silhouette March Promo via Indie Wed

Use promo code INDIE

Through March 8th March 10th, Silhouette is running a promotion where you can get your very own Silhouette machine at a discount.  You can get either the Cameo which is what I bought, or the Portrait which is smaller, lighter version (shown above).  If you already have the basic software you can also upgrade to the Designer Edition which is also what I have. It is perfect if you like to create your designs first in a program like Illustrator like I do.  To take advantage of this month’s promotion, click HERE.  ( <— you have to use this specific link otherwise the code wont work).  Make sure you enter the promo code INDIE during checkout.

I already have like 10 other projects planned with this thing and can’t wait to share those too.

4 In Inspiration/ Real Weddings

Real Wedding: Leslie & Collin

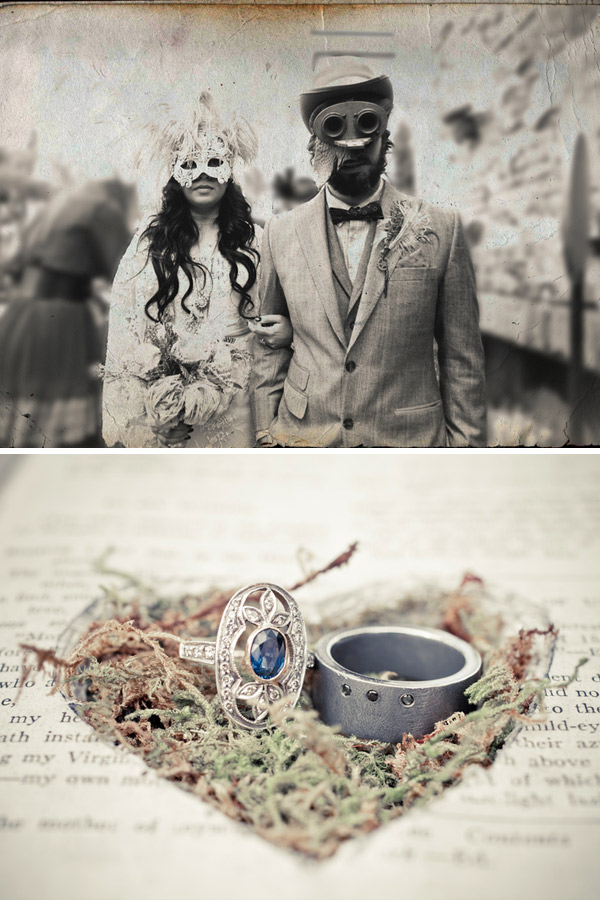
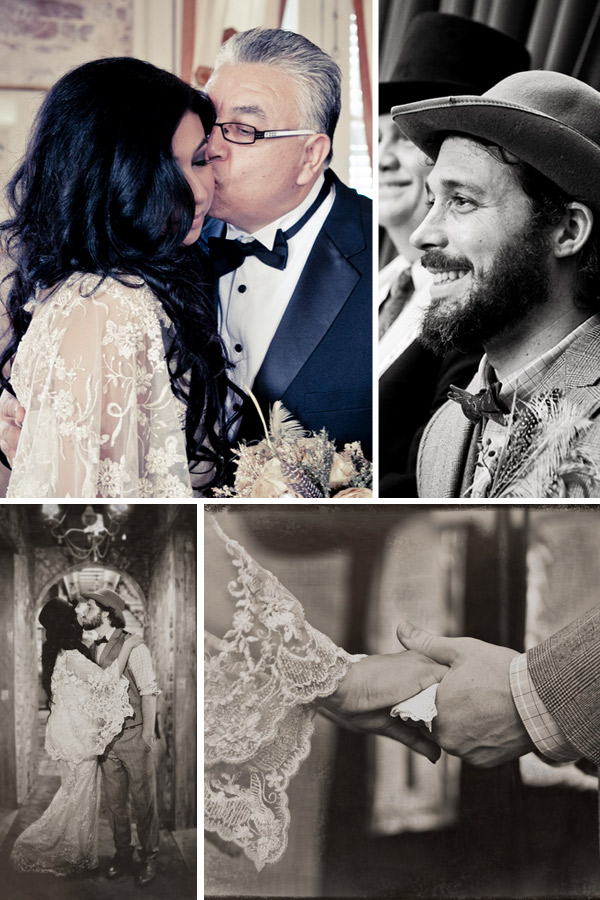
When this wedding showed up in my inbox last week I couldn’t wait to show it.  While I still have a soft spot for the rustic barn weddings with burlap and that homespun vibe, it was refreshing to see a wedding that looked and felt so different than everything out there these days.  There was so much attention to detail that I felt transported, looking through all the photographs. I could imagine the sounds, the smells, the tastes and it was magical.  Meet Leslie Rivas & Collin Kelly.

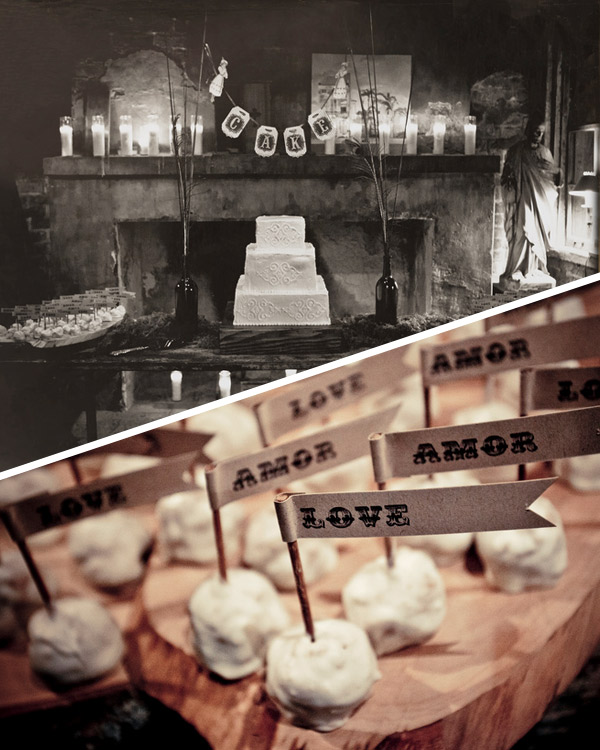
Magical New Orleans Wedding via Indie Wed blog

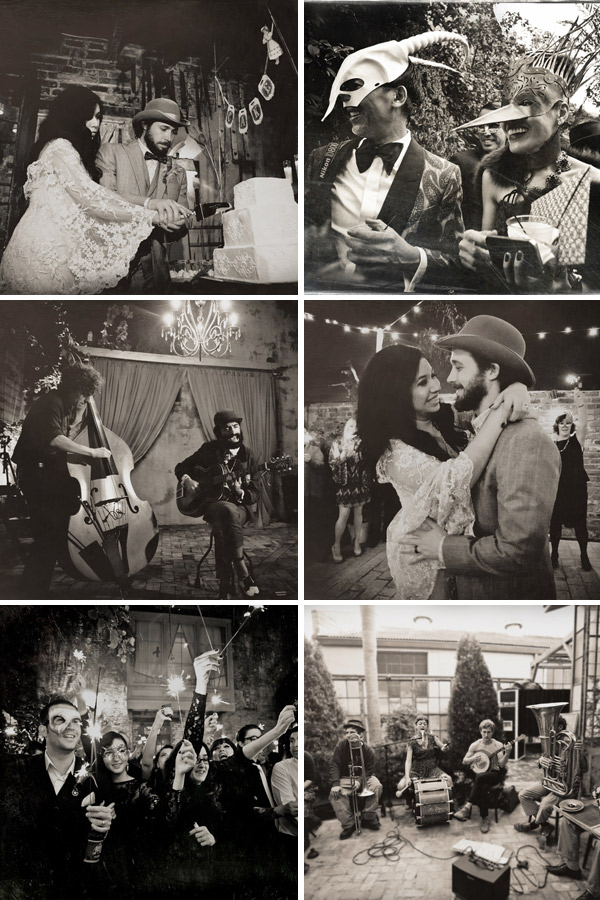
Leslie and Collin met 12 years ago when she moved from California to Houston and they haven’t spent a day apart since.  Though based in Houston, the two consider New Orleans one of their favorite places so it was only fitting to have their wedding in a city that meant so much to them.  Their friends and family traveled from all over the country as well as Mexico to help them celebrate.

Magical New Orleans Wedding via Indie Wed blog

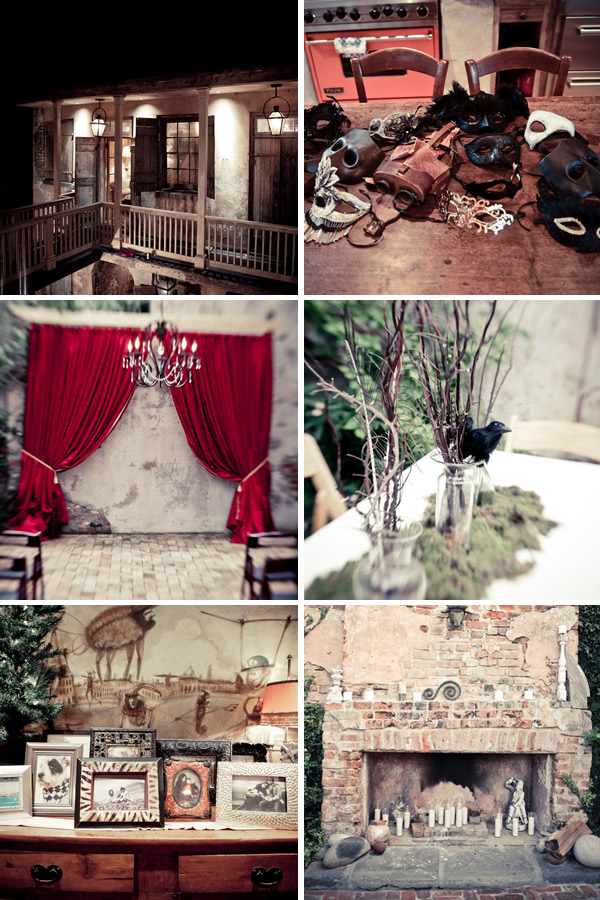
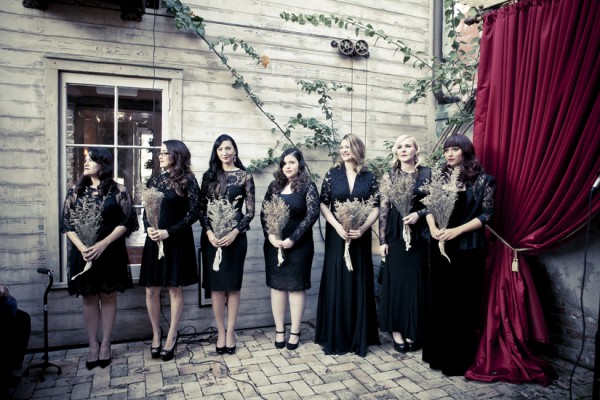
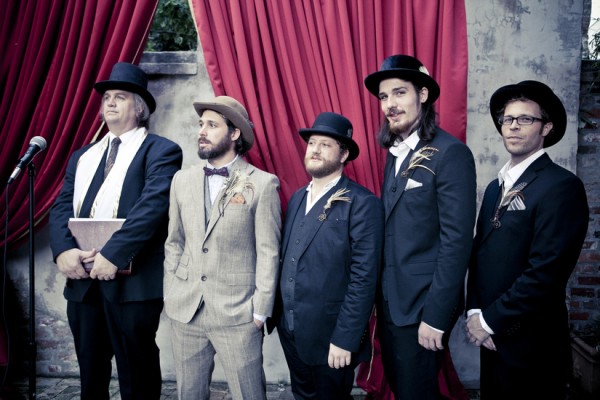
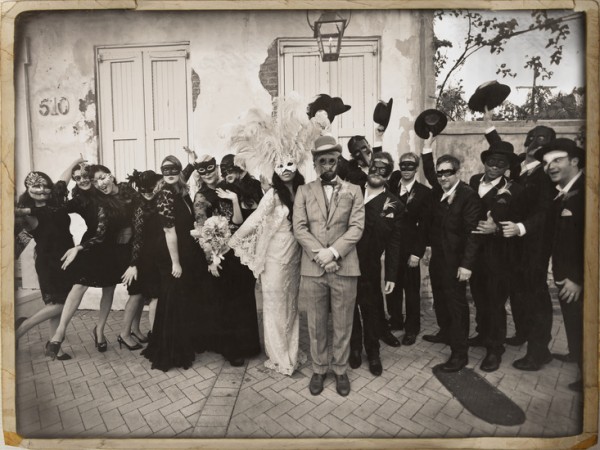
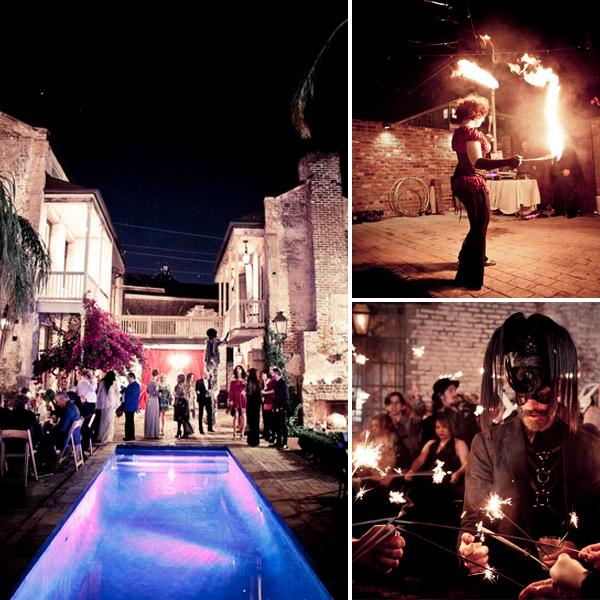
Named after the cross streets, their venue, a private home for rent, Race & Religious served as the perfect backdrop for their ceremony and reception.  Leslie, a fashion stylist, and Collin, a photographer, combined their love for vintage circus, vaudeville, & masquerade elements to create a theme that was uniquely them.

Magical New Orleans Wedding via Indie Wed blog

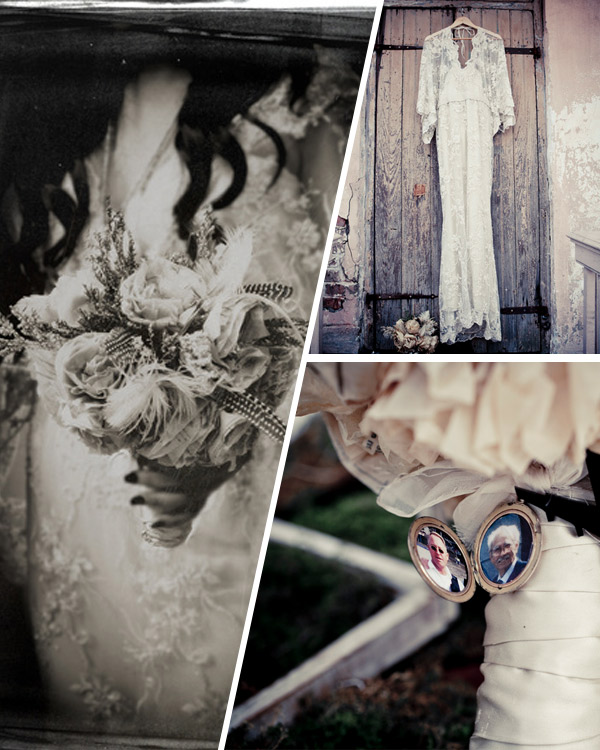
About her bouquet, Leslie says she made it using a mix of “dress patterns made into tissue flowers, antique brooches, dried flowers and feathers,  then an antique locket with a picture of my grandfather and my husbands father in memory and also a black lucite airplane pin”

Magical New Orleans Wedding via Indie Wed blog

Magical New Orleans wedding via Indie Wed blog

Magical New Orleans Wedding via Indie Wed blog

Magical New Orleans Wedding via Indie Wed blog

The reception included everything from vintage George Mellies films that were a favorite of the couple to stilt walkers, a fire dancer, a dog and clown act and mimes, all with an old world vibe.  The band Tuba Skinny as well as local street performer Salvatore Geloso provided the musical ambience for the reception.

Magical New Orleans Wedding via Indie Wed blog

Honestly there were just so many amazing photographs to show that I had a difficult time choosing.  Thankfully Leslie and Collin created a website where you can view all of these and many more.  I highly encourage you to check it out.  And if you get a chance, visit their personal websites.  They are uber talented and there are some amazing editorial photo shoots they worked on together.

Venue: Race & Religious, New Orleans,  Concept & Styling: Leslie & Collin,  Wedding Coordinator: Amanda Irby,  Cake: carrot cake balls, red velvet and white butter cream  made by Aunt Rebecca,  Photography: The couple’s dear friends Jhane Hoang  & Arthur Garcia Bands: Tuba Skinny  & Salvatore Geloso,  Wooden signs, cake stands etc: Father of the Bride, Invitations: Royal SteamlineBride’s Dress: custom made by Jiozei H Reyes, Bridesmaids’ attire: each selected own black lace dresses from designer Jerri Moore and store Zara, Bridesmaids’ bouqets: made from dried natural caspia, ribbon made from leftover wedding dress fabric and a Holy Spirit charm by the bride and Groom’s mother, Make-up/Hair: stylist Bianca Linette Rivas (Bride’s sister), Groom’s attire: vintage suit, shoes & bowler hat, Boutonniere: made by Groom from feathers, dried twigs, wrapped with leather and camera gears

 
1 In Jewelry

Ring Finger Reasoning

I may be the only one who doesn’t know this little tale from the Chinese that tells the story of why we traditionally put our wedding rings on our fourth finger.  Just in case you have never heard this either, I thought I’d share.  It is just a sweet little story.  (I tried to locate some historical background on the story but sadly all I could find were posts alluding to a Chinese story)

photo via here

photo via here

Your thumb represents your Parents.
Your index finger represents your Siblings.
Your middle finger represents Yourself.
Your ring finger represents your Life Partner.
Your last (pinkie) finger represents your Children.

Try this little experiment.  Open your hands, palm to palm, and bend the middle fingers, touching them together, back to back.  Next take the remaining fingers and put them together fingertip to fingertip.  Like this…

photo source

With the rest of your fingers still together, try to separate your thumbs (representing your parents).  They will open because you are not destined to live forever with your parents.  Now put those back together.

Try to do the same with your index fingers (siblings).  Those two will open because your siblings will have their own lives and families.  Again, join those fingers back together.

Now try your pinkie fingers (children).  Those too will separate because your children will eventually grow up and start their own families.  Join the pinkies together again.

Lastly, try to separate your ring fingers (representing your spouse).  You simply can’t open them because the story goes… you and your spouse are meant to remain together your whole lives.  Sweet huh!

Now there is a scientific reason that this works, having to do with the nerves in your hand, yadda yadda.  But we prefer to suspend disbelief and assume it is simply because of that lovely little tale.

1 In Color Palettes

Color Crazed : Lavender & Linen

close up editedHey there, Indie Wed-heads! I’m Stephanie Schertz from The Eventful Life and I’m thrilled to share my first of many guest posts on the Indie Wed blog. There’s no such thing as too much “wedding talk” in my book, which is why I started my own company to help indie brides with full-scale wedding planning or a la carte options like budgeting, vendor research, and style consultations. I’m also a sucker for a vase full of blush peonies. Nice to meet you.

In seventh grade, I painted my bedroom lavender and loved it.

Then it stayed that color for five years.

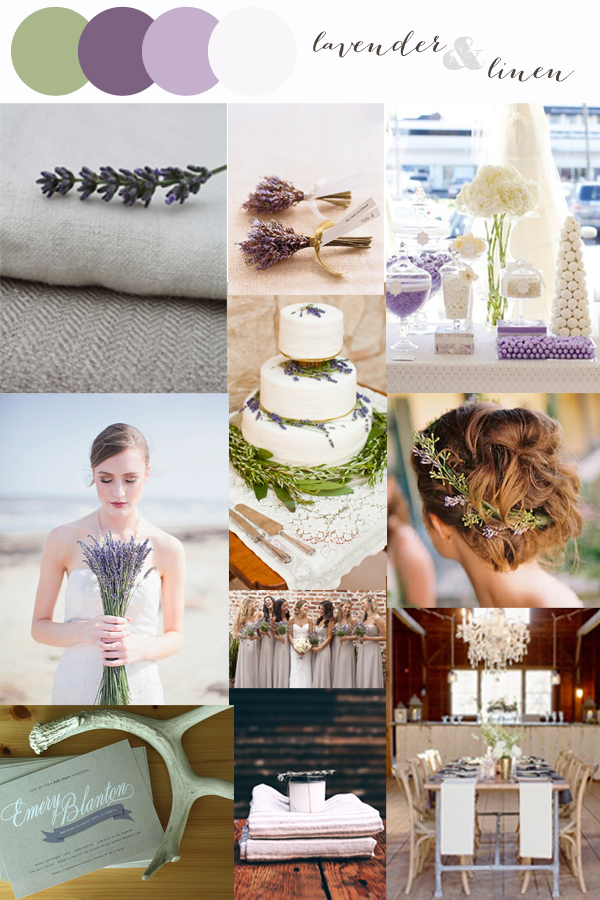
I left for college sure that I would never want anything lavender ever again, but the more I saw the plant that inspired the color, the more I realized how charming and chic it can be. Grouped together in a simple bouquet or woven into a messy updo, lavender makes a lovely pair with the cozy minimalism of linen. Couple these two together for a soft yet impactful base to a modern decor plan.

LavenderandLinenModern-withpalette

image credits (clockwise from top left) : single sprig / lavender bouts / sweets table via Hosting Essence / messy updo / tablescape via 100 Layer Cake / folded linens / stationery / lavender bouquet via Wedding Chicks / cake via Wedding Tips / bridal party via Elizabeth Anne Designs

0 In Cinematography

Cinematography For All Budgets

If you attended the winter Indie Wed and visited the Belles & Gents Lounge then you most likely saw a big tv playing a black and white film on a loop.  Presented by Amelia Street Studio, this trio of talented sisters created a lovely visual element for our lounge, highlighting the city of Chicago in a way befitting our theme.

Belles & Gents Lounge – IndieWed 2013 from Amelia Street Studio on Vimeo.

Most people only think of having someone there to film the event but don’t really think about incorporating existing footage into the event. Or when they do, they assume it is really expensive and has to be this custom made movie.  One thing to think about, is if your cinematographer has existing footage they can use.  For example, the gals from Amelia Street can take the video above and change the music, get rid of the text (or replace it with your names), and even change the look and feel…. they have the raw color footage and can transform it to work with any style of wedding.  It would be a great way to showcase the city of Chicago to your guests.  They also have lots of b-roll footage of non Chicago specific scenes for those getting married in other areas.  This can be a great cost-effective way to incorporate visual elements into your big day.

0 In Events/ Wedding Planning

Bridal Bootcamp at Mignonette

Now that Indie Wed is over and you narrowed down your list of potential vendors, perhaps you are looking for some more advice….

A group of Indie Wed alums along with some other local vendors are participating in a Bridal Bootcamp.  The day is chock full of great advice and tips for the bride to be, in a more intimate setting.  Space is limited so sign up soon.  Tickets are $25 per person.

Here’s the day…

11:00am-11:20am
Bananas, Apples and Pears, Oh No!
Finding the Best Fit for Your Shape

11:20am-11:40am
Those Mason Jars Cost HOW MUCH?!
Planning a Realistic Budget for YOUR Wedding

11:40am-12:00pm
But I Look Funny When I Smile!
Working With Your Photographer To Look Picture Perfect

12:00pm-12:30pm
A Foodie’s Dilemma
Using Your Personal Taste To Create A Unique Wedding Menu

12:30pm-12:50pm
Story & Imagination
Planning the Wedding of Your Dreams

12:50pm-1:10pm
Please Don’t Stop The Music
How To Pick The Right DJ and Honor Your Musical Tastes At The Same Time!

1:10pm-1:30pm
Blossoming Possibilities
Why Picking Seasonal, Local Flora is the Smart
and GREEN Way To Go

1:30pm-1:50pm
Orange You Glad I Said Hello
Save the Dates and Invitation Etiquette, simplified

1:50pm-3:00pm
Meet & Greet with Vendors

 There are some wonderful local vendors participating so please check out this event.  It is organized by Mignonette Bridal & Citygirl Weddings & Events.