UPDATE: The promotion listed below has been extended until March 10th.
In an ongoing effort to beef up this blog, I’m going to start posting the occasional DIY project. Anything I can think of that will be fitting for your wedding (and beyond). So let’s get crafty!
Perhaps it is because of the fun things Nicole has made over at Making It Lovely, but I have wanted one of those Silhouette die cutting machines for a while. For my recent birthday I decided to treat myself and buy one. I have a few ideas of things I want to make with it but thought it might be fun to start showing some DIY projects you could do for your wedding. First up, some fun table numbers I created.
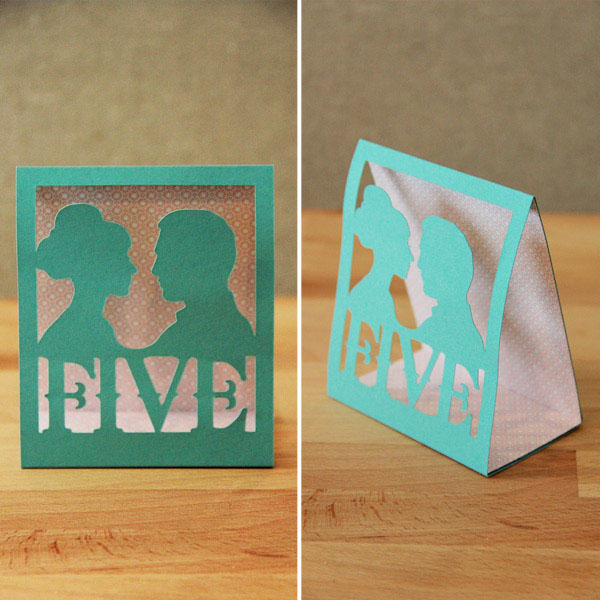
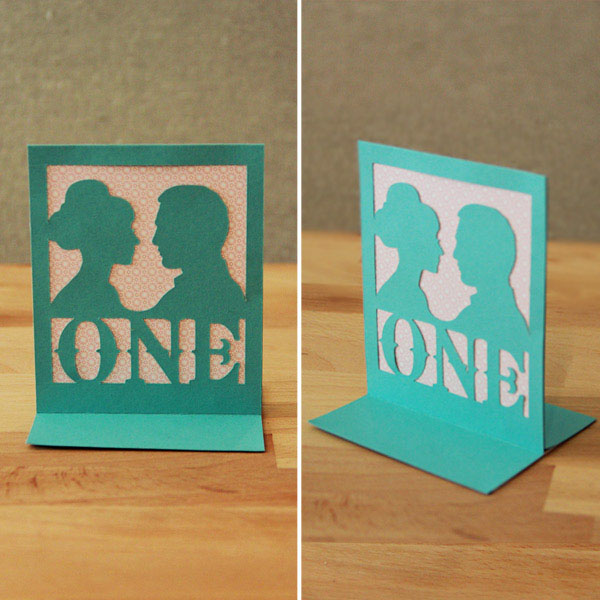
If this couple looks familiar, it is because I originally designed them for the most recent Indie Wed winter show and they were in all the promo material. Beyond that, if they look familiar it is because they were based off of a variety of photographs, mostly from Audrey Hepburn and Paul Newman (who should have been in a movie together!) My original idea was to create this tent fold table number as shown above. I created two different ones and while assembling them I decided to try something different with the second one. See below. Which do you like best?
This was really the first thing I made with my Silhouette so I’m still learning how to use it. (Any tips or tricks are appreciated btw). For those of you that are considering getting one, a few things to note…. There are two different styles of the Silhouette machine… the Cameo (MSRP $299) and the Portrait (MRSP $199). The Cameo is larger cutting up to 12×12″. The portrait is smaller, lighter and less expensive and perfect for smaller projects. It cuts up to 8.5″ wide I believe. I decided to go big and buy the Cameo. Compared to a large AccuCut die cutter I have, this thing is pretty small, like a small printer. It comes with the Silhouette software which you have to use to actually cut anything. While the software has a lot of basic functions (and perhaps if I use it more, will seem even more comprehensive), I prefer to do all my designing in Adobe Illustrator. It is just what I feel comfortable with. What I didn’t realize is that the two weren’t really compatible. You can’t design something in Illustrator and cut it out unless you upgrade to their other software, the Designer Edition for $50. Well I knew I would be doing most of my work in Illustrator so I got the upgrade and am super glad I did.
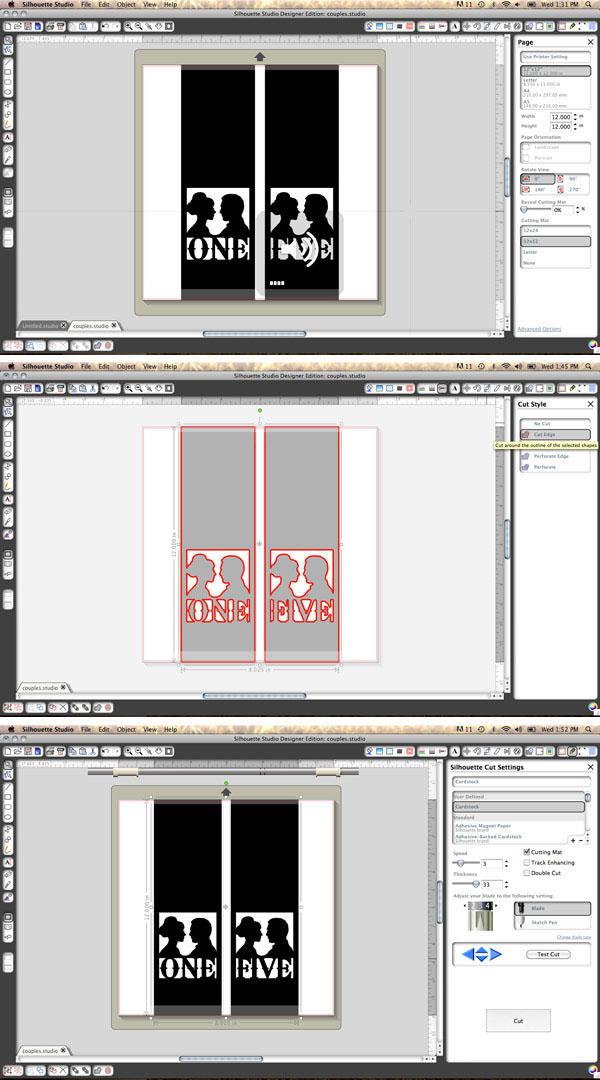
All you do is save your Illustrator image as an .svg file and open it in the Silhouette Software. Next you select everything and ungroup (which is great if you have something with different colors on it). You then click on this other button for the cutting style and it basically just traces the edges so they become cut-ready. Lastly you just select your cutting options which has to do with what type of material you are cutting (this thing cuts everything from paper to vinyl to fabric!). I actually found this tutorial online which helped a lot.
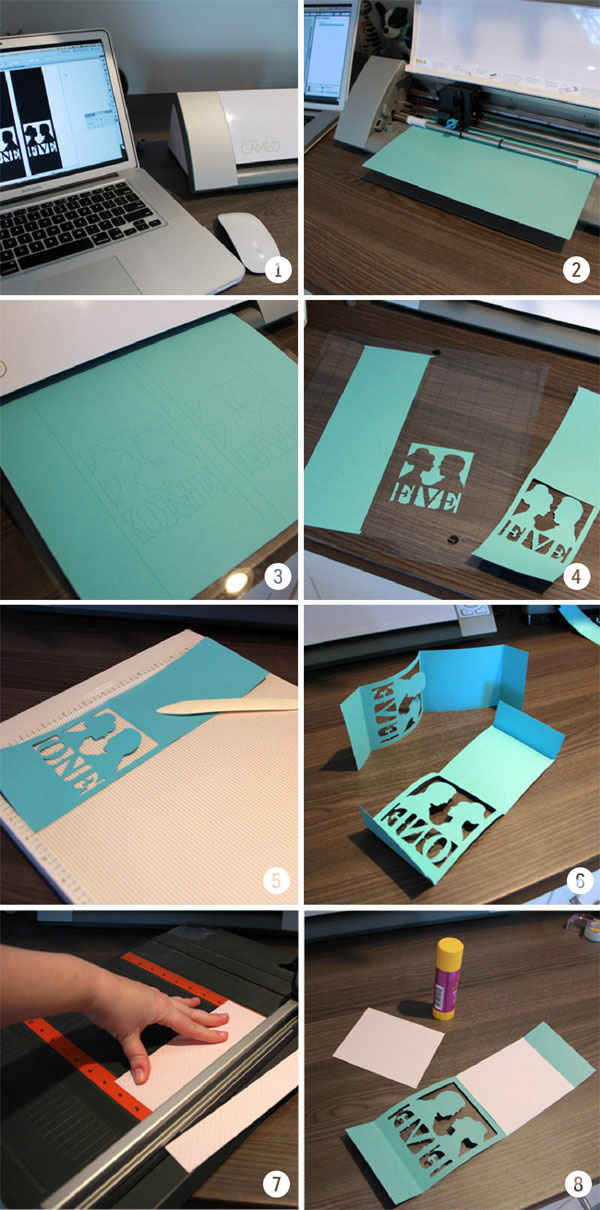
Here is a quick breakdown of the steps to make the table cards. While I was doing the final steps, I didn’t have anyone to photograph me assembling them so I’ll try to explain it. It is really easy!
1. Create your image and open it using the Silhouette software (Designer Edition if you want to import from Illustrator).
2. Load your paper into the machine & set your cutting preferences. You adhere the paper to a thin, slightly tacky, plastic cutting board
3. Watch it cut. This step is really interesting. When I did my first test I thought my machine was broken…. it made this weird sound as it was cutting, almost like signing. I quickly googled it and realized that this was normal. You get used to it pretty fast and it is actually a bit relaxing. It makes its own music!
4. When you are done you peel away the paper from the plastic cutting board. I really liked the way the scraps from the negative space looked as it was left behind.
5. I trimmed any little bits on the ends and then scored the paper using this handy scoring tool I picked up a while ago. These particular cards are 12″ long and 3.75″ wide. I scored them in half (6″ mark) and then 1.5″ up from each end.
6. After scoring, I gently folded them along the creases.
7. Since I wanted the silhouettes to stand out against the inside of the tent fold, I cut some paper in a contrasting color. This was some pretty paper with a soft pink and white pattern.
8. Glue the cut paper (3.75″ x 4.5″) to the inside back of the card.
To finish the tent fold style… I just took the two bottom flaps and glued them together, overlapping about a 1/2 inch. I realized when looking at it standing up that the the number disappeared into the bottom of the tent fold so I cut another piece of the pink paper and attached it to the inside bottom of the card. You can see that in the 3/4 view in the top photo.
To finish the flat style card…. After step 8, I just glued the back of the cut silhouette side and stuck it all together. I left the flaps unglued and flared them out for support. The to just give it a little more stability, I cut a scrap of paper the total size of the flaps and glued it to the bottom. However, if you were using a pick or a stand for your table numbers, you could just cut the flaps off and use the stand.
These were super fun and you could do so many different things with this concept… use your own silhouettes, cut skylines from your favorite cities, or any other variety of shapes that could play off of your interests. You could also just do straight text and even make signage for other parts of the reception.
So now for the fun part for you! After I bought my machine, I contacted the Silhouette people with some questions I had about the software etc. When I was explaining to them how I wanted to use the machine they offered to create a discount code for anyone I know who might also want to try their hand at using a Silhouette machine. If I can pass on some savings so other crafty folks can make cool things for their wedding (or business, or house, or kids or… well you get the idea) then sure, why not.
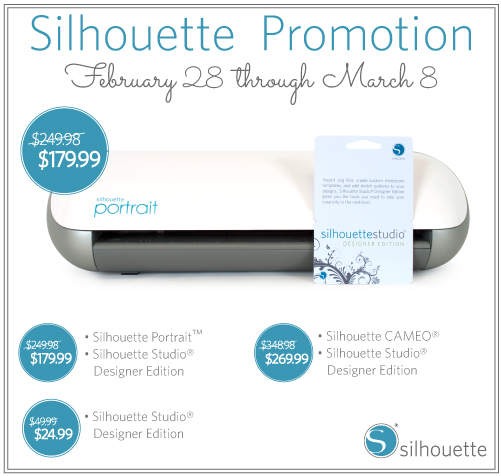
Use promo code INDIE
Through March 8th March 10th, Silhouette is running a promotion where you can get your very own Silhouette machine at a discount. You can get either the Cameo which is what I bought, or the Portrait which is smaller, lighter version (shown above). If you already have the basic software you can also upgrade to the Designer Edition which is also what I have. It is perfect if you like to create your designs first in a program like Illustrator like I do. To take advantage of this month’s promotion, click HERE. ( <— you have to use this specific link otherwise the code wont work). Make sure you enter the promo code INDIE during checkout.
I already have like 10 other projects planned with this thing and can’t wait to share those too.
No Comments