Browsing Category

Decor

1 In Contests & Giveaways/ Decor/ DIY Projects

DIY Day: Personalized Napkins + Promo

I’m back with another fun DIY project.  Yay!
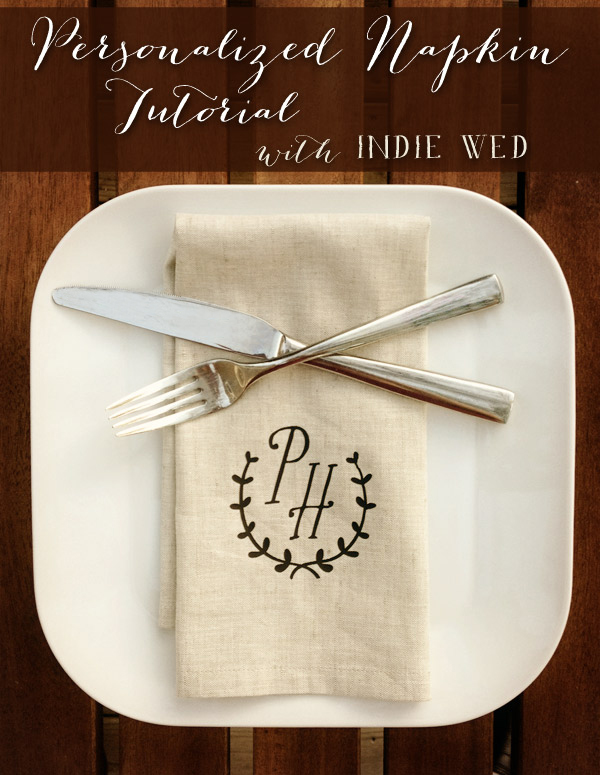
So I’m totally stuck on this Silhouette machine I bought a few months ago and have been trying to figure out how to make a lot of different things with it, especially ones that could be used for a wedding.  The Silhouette folks were nice enough to send me some of their heat transfer material to play around with and I came up with a fun project that I can’t wait to do for my next dinner party… personalized napkins.


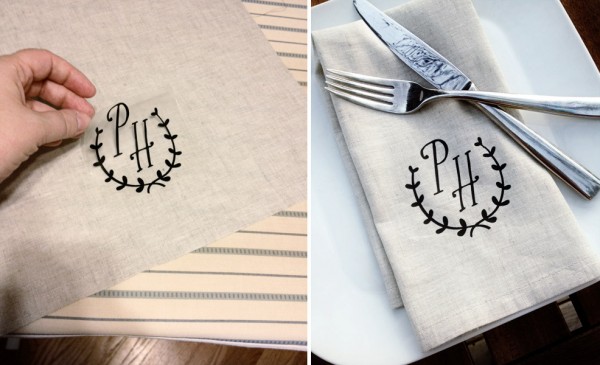
DIY napkins via Indie Wed

Couples are always looking for ways to add personal touches to their nuptials.  These cute napkins are one way.  And if it seems too overwhelming for a whole wedding, just focus on the head table.  Or think about smaller, related events such as the rehearsal dinner or even an engagement party.  Incorporate initials or a monogram like I’ve done, or use some other design element from your wedding; silhouettes, a pattern, text… the possibilities are endless.

The transfer material comes in all sorts of colors (including glitter and some fuzzy flocked colors too) and once ironed on can be washed (with some care).

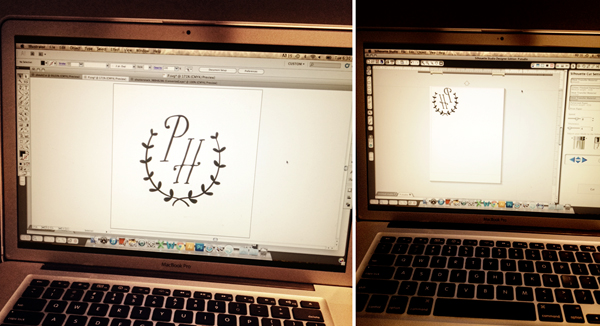
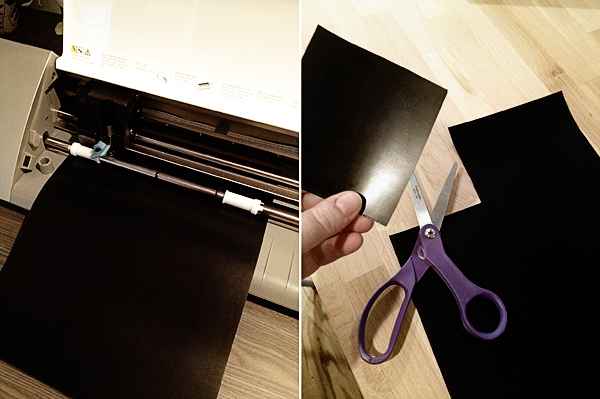
First I drew out my design in the computer.  You have to make sure the design is then mirrored so that it cuts backwards.  Trust me, it will work in the end.  Once you have your design all set, feed your heat transfer material into the machine and send it through.

napkin2

napkin

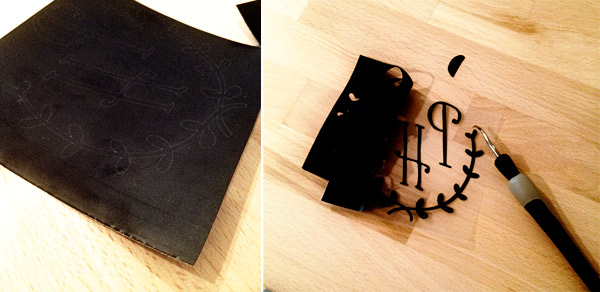
Once your design is all cut out, you peel away the material covering the negative space.  They even make this handy little hook that helps getting all the little bits from any nooks and crannies.

napkin3

The remaining transfer material is on this slightly sticky piece of plastic.  Take that and place it onto your napkin so the design is now going the correct way.  Lay a piece of fabric over the transfer press firmly with an iron for 45-60 seconds.  This is where it can get a little tricky. You have to start peeling back the corner and see if it is all stuck down.  If not, you apply more heat and recheck until the plastic comes off cleanly.  With my project, it worked great except for one little part of the vine where it was the thinnest.  It didn’t transfer as well and I had to fidget with it more.  But with more practice I think it would be super easy.

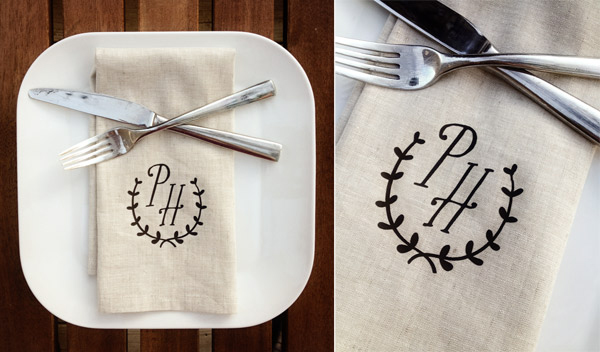
DIY napkins via Indie Wed

For my napkins, I used raw linen that I cut and sewed into a napkin.  Obviously you don’t have to go that far.  You could easily buy pre-made napkins and add the transfer.  Heck, you could do the same on the tablecloth as well.  Or a vintage hankie tied around a wine bottle for a centerpiece.  Or canvas totes for guests. I could keep going…

DIY napkins via Indie Wed

Overall, I think this project was super cute.  I really liked the look of the black against the linen with this particular design but I could totally see doing something really wild with color.  Lucky for you, there is a promotion right now for you to try out the handy dandy heat transfer material yourself.

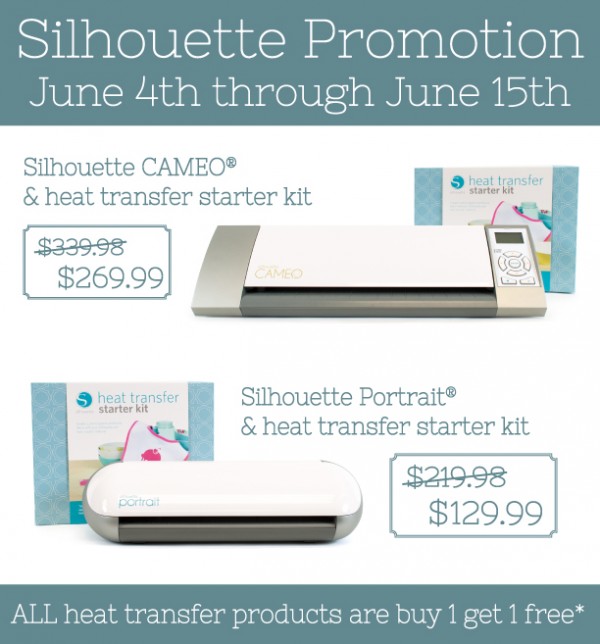
June Promo via Indie Wed

Silhouette has a promo going on right now where you can get either the Cameo or the Portrait plus the heat transfer starter kit for a huge discount.  Personally I’m a little jealous since it is cheaper than what I paid for mine.  If you already have a Silhouette machine you can just by the transfer materials for a buy 1 get 1 free deal.  (The free item is the one that is equal or lesser value).  Just follow this link and use the promo code INDIE for the discount.  Have you used the heat transfer material before?


0 In Decor/ DIY Projects

DIY Table Numbers + Silhouette Promo

UPDATE:  The promotion listed below has been extended until March 10th.

In an ongoing effort to beef up this blog, I’m going to start posting the occasional DIY project.  Anything I can think of that will be fitting for your wedding (and beyond). So let’s get crafty!

Perhaps it is because of the fun things Nicole has made over at Making It Lovely, but I have wanted one of those Silhouette die cutting machines for a while.  For my recent birthday I decided to treat myself and buy one.  I have a few ideas of things I want to make with it but thought it might be fun to start showing some DIY projects you could do for your wedding.  First up, some fun table numbers I created.


DIY Silhouette Table Numbers via Indie Wed blog

If this couple looks familiar, it is because I originally designed them for the most recent Indie Wed winter show and they were in all the promo material.  Beyond that, if they look familiar it is because they were based off of a variety of photographs, mostly from Audrey Hepburn and Paul Newman (who should have been in a movie together!)  My original idea was to create this tent fold table number as shown above.  I created two different ones and while assembling them I decided to try something different with the second one.  See below.  Which do you like best?

DIY Silhouette Table Numbers via Indie Wed blog

This was really the first thing I made with my Silhouette so I’m still learning how to use it.  (Any tips or tricks are appreciated btw).  For those of you that are considering getting one, a few things to note…. There are two different styles of the Silhouette machine… the Cameo (MSRP $299) and the Portrait (MRSP $199).  The Cameo is larger cutting up to 12×12″.  The portrait is smaller, lighter and less expensive and perfect for smaller projects.  It cuts up to 8.5″ wide I believe.  I decided to go big and buy the Cameo.  Compared to a large AccuCut die cutter I have, this thing is pretty small, like a small printer.  It comes with the Silhouette software which you have to use to actually cut anything.  While the software has a lot of basic functions (and perhaps if I use it more, will seem even more comprehensive), I prefer to do all my designing in Adobe Illustrator.  It is just what I feel comfortable with.  What I didn’t realize is that the two weren’t really compatible.  You can’t design something in Illustrator and cut it out unless you upgrade to their other software, the Designer Edition for $50.  Well I knew I would be doing most of my work in Illustrator so I got the upgrade and am super glad I did.
DIY Silhouette Table Numbers via Indie Wed blog

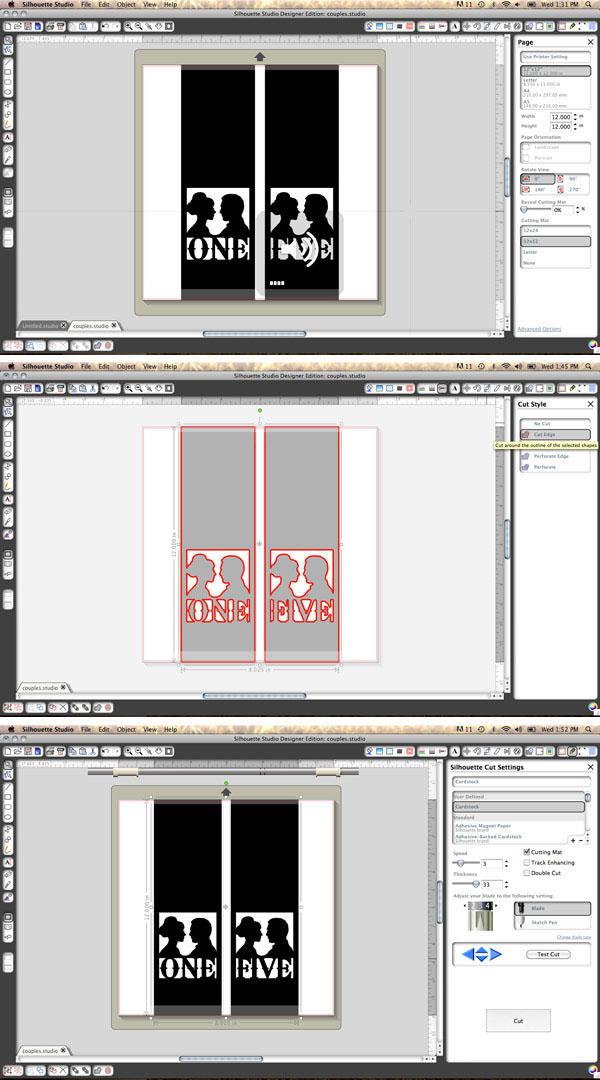
All you do is save your Illustrator image as an .svg file and open it in the Silhouette Software.  Next you select everything and ungroup (which is great if you have something with different colors on it).  You then click on this other button for the cutting style and it basically just traces the edges so they become cut-ready.  Lastly you just select your cutting options which has to do with what type of material you are cutting (this thing cuts everything from paper to vinyl to fabric!).  I actually found this tutorial online which helped a lot.

DIY Silhouette Table Numbers via Indie Wed blog
Here is a quick breakdown of the steps to make the table cards.  While I was doing the final steps, I didn’t have anyone to photograph me assembling them so I’ll try to explain it. It is really easy!

1.  Create your image and open it using the Silhouette software (Designer Edition if you want to import from Illustrator).
2.  Load your paper into the machine & set your cutting preferences.  You adhere the paper to a thin, slightly tacky, plastic cutting board
3.  Watch it cut.  This step is really interesting.  When I did my first test I thought my machine was broken…. it made this weird sound as it was cutting, almost like signing. I quickly googled it and realized that this was normal.  You get used to it pretty fast and it is actually a bit relaxing.  It makes its own music!
4.  When you are done you peel away the paper from the plastic cutting board.  I really liked the way the scraps from the negative space looked as it was left behind.
5.  I trimmed any little bits on the ends and then scored the paper using this handy scoring tool I picked up a while ago.  These particular cards are 12″ long and 3.75″ wide.  I scored them in half (6″ mark) and then 1.5″ up from each end.
6.  After scoring, I gently folded them along the creases.
7.  Since I wanted the silhouettes to stand out against the inside of the tent fold, I cut some paper in a contrasting color. This was some pretty paper with a soft pink and white pattern.
8.  Glue the cut paper (3.75″ x 4.5″) to the inside back of the card.

To finish the tent fold style… I just took the two bottom flaps and glued them together, overlapping about a 1/2 inch.  I realized when looking at it standing up that the the number disappeared into the bottom of the tent fold so I cut another piece of the pink paper and attached it to the inside bottom of the card.  You can see that in the 3/4 view in the top photo.

To finish the flat style card…. After step 8, I just glued the back of the cut silhouette side and stuck it all together.  I left the flaps unglued and flared them out for support.  The to just give it a little more stability, I cut a scrap of paper the total size of the flaps and glued it to the bottom.  However, if you were using a pick or a stand for your table numbers, you could just cut the flaps off and use the stand.

These were super fun and you could do so many different things with this concept… use your own silhouettes, cut skylines from your favorite cities, or any other variety of shapes that could play off of your interests.  You could also just do straight text and even make signage for other parts of the reception.

So now for the fun part for you!  After I bought my machine, I contacted the Silhouette people with some questions I had about the software etc.  When I was explaining to them how I wanted to use the machine they offered to create a discount code for anyone I know who might also want to try their hand at using a Silhouette machine.  If I can pass on some savings so other crafty folks can make cool things for their wedding (or business, or house, or kids or… well you get the idea) then sure, why not.
Silhouette March Promo via Indie Wed

Use promo code INDIE

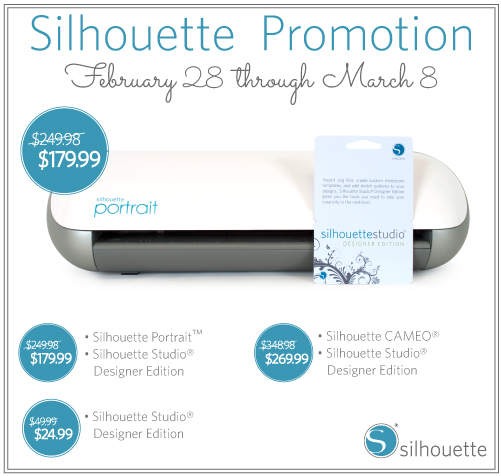
Through March 8th March 10th, Silhouette is running a promotion where you can get your very own Silhouette machine at a discount.  You can get either the Cameo which is what I bought, or the Portrait which is smaller, lighter version (shown above).  If you already have the basic software you can also upgrade to the Designer Edition which is also what I have. It is perfect if you like to create your designs first in a program like Illustrator like I do.  To take advantage of this month’s promotion, click HERE.  ( <— you have to use this specific link otherwise the code wont work).  Make sure you enter the promo code INDIE during checkout.

I already have like 10 other projects planned with this thing and can’t wait to share those too.
0 In Contests & Giveaways/ Decor/ Inspiration

Vote for Your Favorite Team – Inspired Creations Contest

If you followed our posts a month or so ago where we introduced you to our Inspired Creations Contest teams, then you would know what sort of talented folks we were working with.

Well the contest is complete, all of the concepts came to life at the most recent Indie Wed event, and now it is time to place your vote.  Each of the entries have been featured in full at the Elizabeth Anne Designs blog.  Please visit each link to see the entry in full.  To vote for your favorite, leave a comment on the EAD blog with the respective post.

Team #1
French Tea Party Dessert Table

Team #2
Belles & Gents Bar 

Team #3
The Ultimate Photo Booth


Team #4
Vintage Hot Air Balloon Inspired 

Team #5
Whimsical Salvage Chic Ceremony


Team #6
Cozy Winter Tabletop


When looking at all the entries in full, keep in mind that all the teams were assigned their locations and didn’t really have a say in where they could set up.  For some this meant dealing with things like vintage neon signs in the corner, or less than natural light.  Also, what you don’t see is that all the displays were created amongst 100+ other vendors’ booths with about over a thousand people walking around throughout the day.  Yet all the photos feel very calm, relaxed, and natural.  I think all the teams did a great job so show some love and vote for your favorite.


2 In Decor/ Inspiration/ Photography/ Real Weddings/ Vintage

Real Wedding: Ashley & Mark

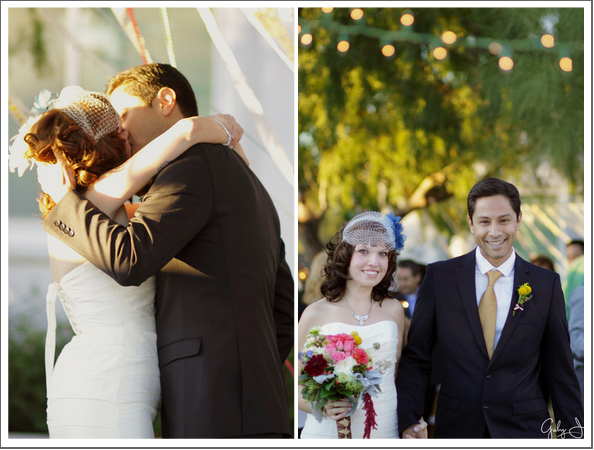
After posting an adorable engagement shoot the other day, I wanted to end the year with this super sweet real wedding courtesy of Gaby J Photography.  She recently shot the Las Vegas backyard wedding of Ashley & Mark and I wanted to share some of the lovely personal touches.

I think sometimes during wedding planning, people can lose sight of the big picture… getting married.  Instead you are focused on registries and head counts and it can be overwhelming for many brides and/or grooms.  This couple kept is simple, got thrifty, and in the end had a very meaning and personal day.

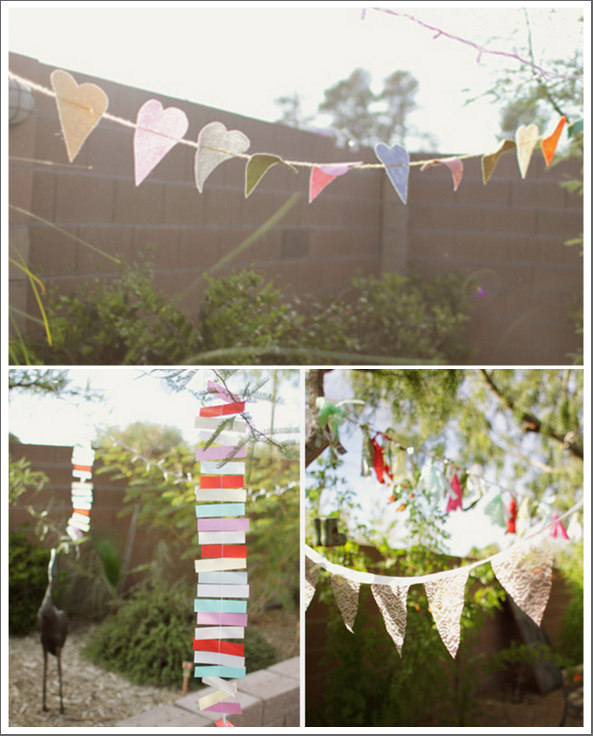
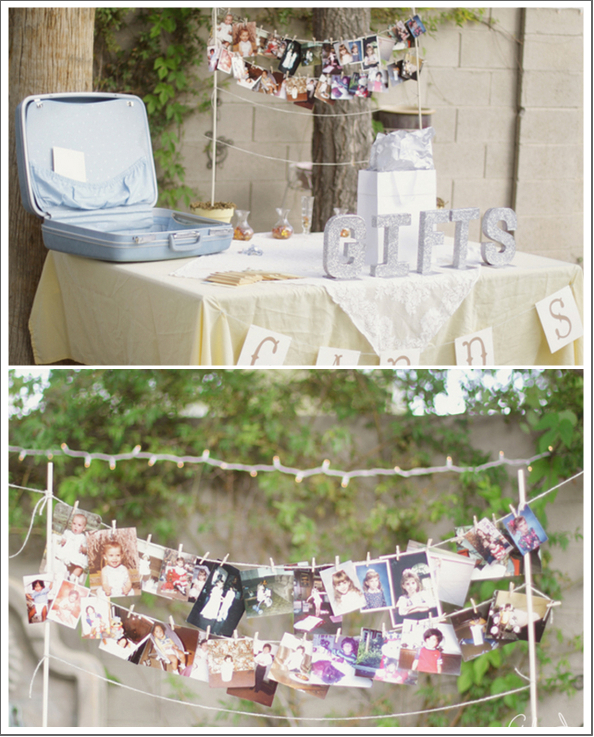
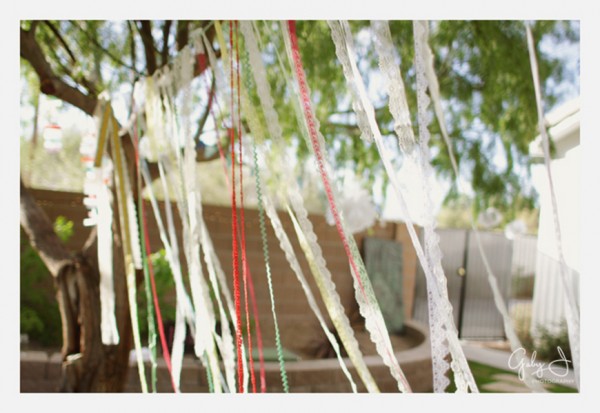
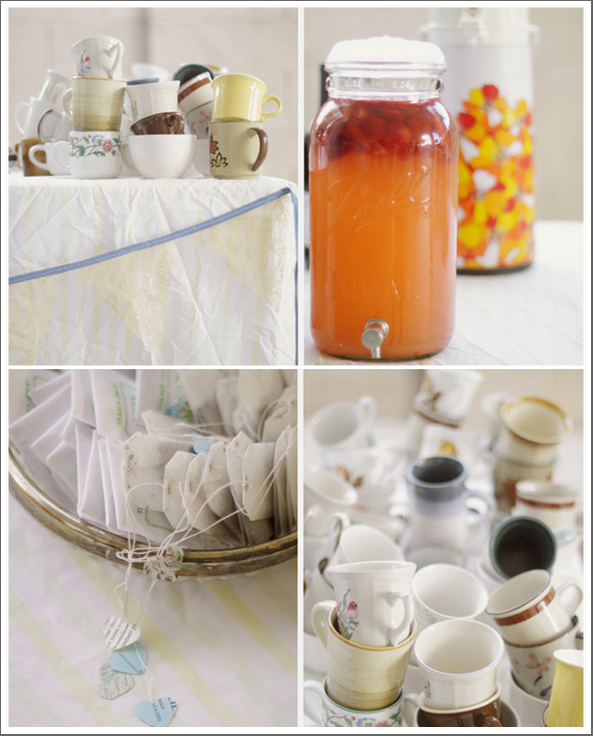
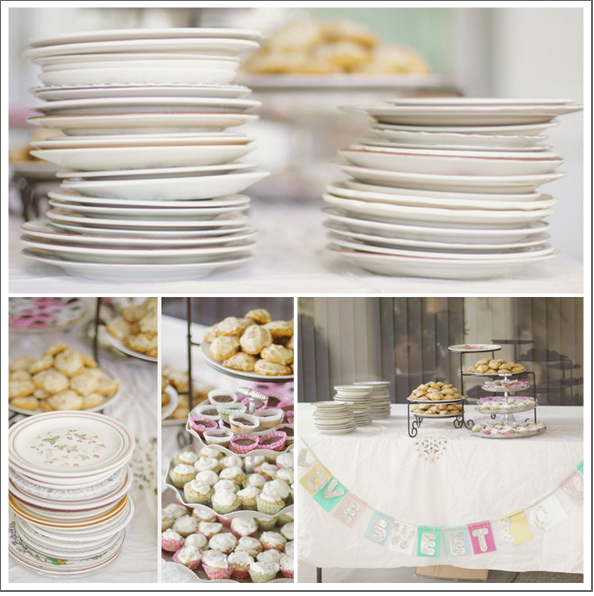
Ashley made all the decorations herself using inspiration from various wedding blogs.  She used a mix of thrifted lace, vellum, felt and anything else she could get a hold of.

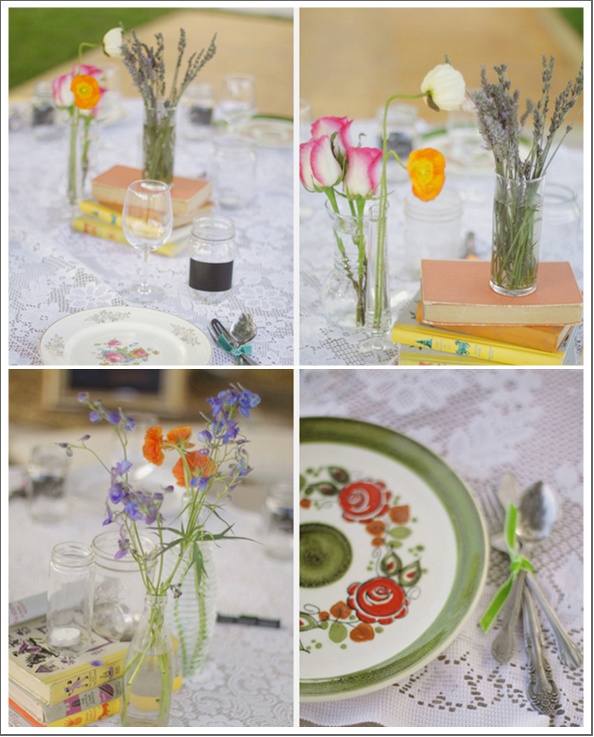
From Ashley, “For months and months, I scoured every thrift store in town searching for vintage floral dinner plates and dessert plates, vintage lace table cloths, doilies, mugs, thermoses, platters, jars, and vases!  It was a lot of work, but it turned out exactly as I planned and in the end, saved a ton of money! ”  One tip from Ashley… she found lace table cloths to be really expensive but found several lace curtains that were much more affordable.  Getting clever, she just layered them onto a plain colored table cloth and voila!  Beautifully covered tables with change to spare.

Ashley said her favorite crafty creation was the mason jar drinking glasses.  She bought chalkboard contact paper (we found some here) and cut them into cute little labels.  Chalk markers (less messy than regular chalk) were placed on the tables so people could write their names on their jars.

To fill their vintage mugs and tea cups, they served hot water for tea, hot cocoa, and warm apple cider in retro pump thermoses.  They had agave syrup, marshmallows, apple slices, and cinnamon sticks as garnishes.  Ashley said this was a big hit!

Another quirky aspect was the totally vintage feel of the images.  Gaby loves vintage cameras, polaroids, and isn’t afraid of light leaks or sunflare.  If it fits the tone of your wedding, feel free to hire a photographer that embraces the past.

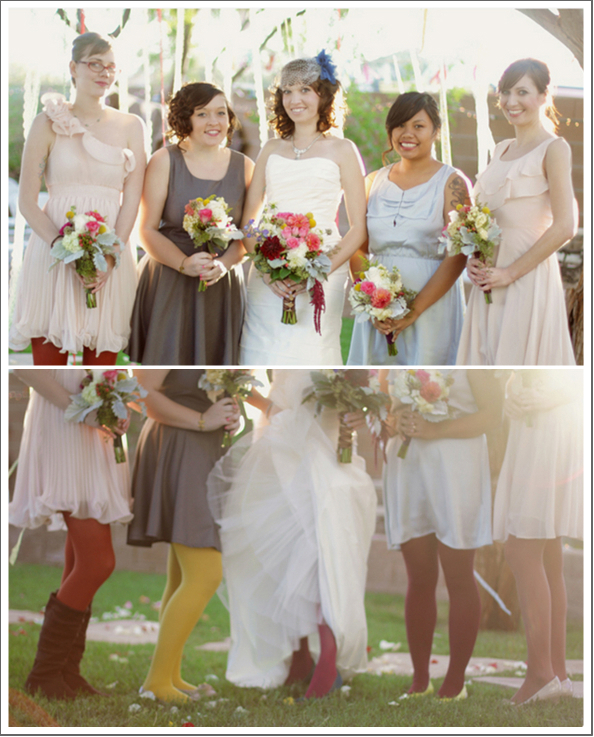
I also love how Ashley & Mark’s whimsical tastes extended to the bridal party.  Look at these adorable gals. (I own mustard yellow tights too and LOVE them!).  It is nice to see each bridesmaid able to express her own style.

Congratulations to Ashley & Mark!  Thank you for letting us share your wedding and to Gaby for sending these our way.  Ashley also has her own Etsy shop where she sells many of the things she makes.  If you aren’t very crafty but like her decorations, you may be able to hire her for your own wedding decor.

1 In Decor/ Inspiration/ Paper Goods

A Paint Chip Wedding

via Superhero Journal

Howdy.  We are in the midst of repainting much of our house and have piles and piles of paint chips.  I have always loved them and have even used them in my artwork.  When people come to me for their invitations or paper goods, I often tell them to visit the paint section of the home improvement store.  Often it is a great place to find just the perfect shade(s) you want for your wedding.  Sometimes one person’s idea of “Bubblegum Pink” or “Robin’s Egg Blue” is different than another person’s.  So grab that paint chip and hand them out to your florist, baker, printer, bridal party or anyone else who might need some specific color guidance.

Beyond using paint chips as a helpful planning tool, I think it would be so fun to incorporate paint chips into your wedding decor.  They can be used to match any color palette and the best part… they are free!

Here are some ideas to inspire you to incorporate paint chips into your big day.  Have any ideas we missed?  Add them in the comments below.

tutorial via Hey Gorgeous

I love this paint chip chandelier from Hey Gorgeous.  These would look lovely hanging above each table or by creating a larger one as a focal point above the dessert table or ceremony spot?

via Once Wed
via La’Di Events

One way to get your guests to their table is by creating paint chip escort cards.  Using single or multi-colored chips, cut them into your desired shape, write out the names and display.  If you are using a calligrapher, give them the chips ahead of time.  Also, large, uncut chips can go through most printers (I would suggest a laser printer) so you can be consistent with the fonts from your invitations and other printed goods.

via My Hands Made It

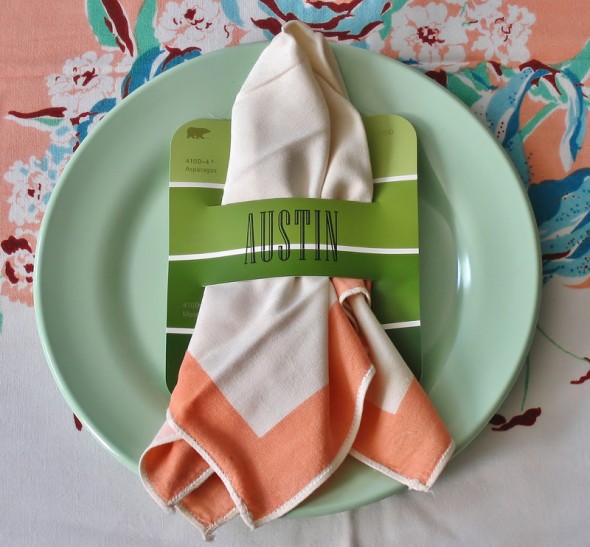
Here is a great tutorial for a laser printed place card, napkin holder.  I love the vintage napkin & tablecloth in this photo as well.  Veronica from My Hands Made It, originally crafted these as a place cards for a housewarming party.  She also created this hand fan for the same party but wouldn’t this ben even more perfect as a paddle fan program for a summer time wedding?

via My Hands Made It

Don’t send your guest home empty handed.  Pass out these adorable favor boxes topped with a paint chip name tag.  Adorable!

via Real Simple

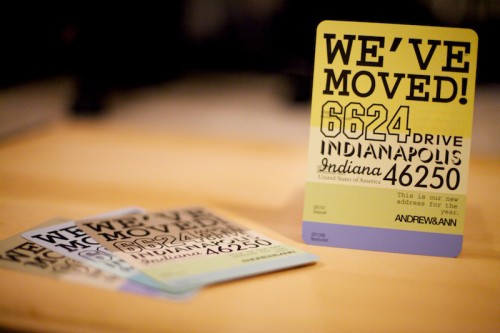
Once the wedding is over and the sparkly dust has settled, announce the address of your new nest with these adorable moving announcements.  Design them on your computer, runt them through your printer, address, stamp, and voila!

via Oh So Beautiful Paper

Don’t fret if you aren’t very crafty, there are hundreds of paint-chip related goods on Etsy .  Everything from garlands to earrings to paper lanterns.  There are dozens of artists around that would happily help you create your perfect paint-chip wedding decor.

0 In Decor/ Flowers/ Inspiration/ Website

A Blumen Bouquet Painting

It’s been gloomy all weekend, but I’ve found it to be the perfect weather to put up my Christmas decorations and start another painting.

You’ll remember the beautiful bouquet that Blumen created for Sarah and Ernest’s fall wedding that Estera Events coordinated….


Welp, Sarah and Ernest have chosen a composition…and I love it!

Isn’t this a lovely representation of Sarah’s bouquet….especially in a 20 x 20 inch format?


Lots of great updates to come about this one….

Cheers!

~Loreen

www.ReenieRose.com

0 In Catering/ Decor/ Eco-Friendly/ Reception

The Great Outdoors

As we head into the darkness of winter us Chicagoans agree on one thing – summer is one of the greatest things about living here. It gives us a chance to explore neighborhoods, enjoy the lake, and take a breath of fresh (not frigid) air. Unfortunately if you want to enjoy the outdoors on your wedding day, you are often limited to pictures on the lakefront or trying desperately to find a venue with outdoor space. However if you happen to have a backyard, try going it on your own. This is not as daunting as a task as it would seem. At many venues you’re bringing in (via rental company) all of the tables/chairs anyway so the cost will be the same. Figuring out rentals, with or without the help of your caterer, is not that difficult and suddenly you have a free venue where you can party all night.

Here are some of the advantages to having a wedding at home (and how our clients implemented them into their events):

♥ DIY Decoration– although, in theory, you can do this at a venue when the venue is your home it is much easier. You can set things up long before the event and don’t have to worry about cleaning everything up at the end of the night.

♥ Use the money you saved on the venue for things that are more important to you – whether that’s a kick-ass band, locally sourced food, decadent offerings, or really nice wine.

♥ Get “outdoorsy” with it. Embrace the casual atmosphere with a casual menu, simple place settings, and Ball jar glasses.


♥ Provide your own food/beverages. You may decide to do everything yourself, make it a potluck, or just bring in some of your favorite homemade items and have a caterer take care of the main meal. At many venues this would be restricted or illegal (food items need to be prepared in a commercial kitchen), but having the event at home allows you to do this.

♥ Being comfortable. Get ready with your bridesmaids in your own room, take photos with your hubby on your stairs, and always know where to find the bathroom/water/a bobby pin.

Post by FIG Catering

Photos by

Edyta Szyszlo Photography/www.edytaszyzlo.com

and Sheila Barabad